Filing/Shaping Tips (step-by-step)

Welcome back to my blog!! I’m sorry I’ve been on and off but these last few months have been cray! Anyway, I’ve been wanting to get back into regularly blogging for a while now and what better way to start than talk you through my shaping tips?
I get asked about my shaping E.V.E.R.Y day! Which is lovely, but it’s also one of the hardest things for me to explain – especially over the internet. But, I’m going to try my best! So here goes…
I’ll start off by showing you my recent work that I’ve been getting on with as I feel my shaping has been improving even more in these last few weeks…
So, I thing my forte or whatever you call it, is my ballerina/coffin shaping. It’s my thing, I’m most confident when I am creating that shape over any others. So I’ll try and break it down and explain what goes through my head when in the process of achieving the slender and in my opinion, most feminine and flattering nail shape.
I always work with a clear base and nine times out of ten, I sculpt. This for me is important (and why I take so damn long to do a set 😩) to ensure that my shape and c-curve is refined before I go in with my design. Providing you work neatly and use minimal product, there is only little refining you need to do when filing to finish after capping any design in clear.

My first tip when filing a clear base (or any nail in general), is to clean up any acrylic that is jagged. This is when you use your file (I use Naio 100/180 grit straight files) underneath the extension to remove any unwanted or uneven acrylic. You should be able to see a perfectly straight line when looking at the nail side-on.
The next step, is the one that I struggle to explain the most, but it is THE most important step that will get you that perfectly straight an slender side wall. You want to take your file and sit it against the side of the extension (from cuticle corner to free edge) and keep the file dead straight. (If looking at the nail from the same angel as the photo… the file would be going up and down instead of left to right. The foam of the file should e facing upwards and it should be snug against the nail. This will achieve a STRAIGHT line from the top of the side wall, to the tip. See the vertical file marks on the bottom photo? That is what it should look like before you file the surface of the acrylic.
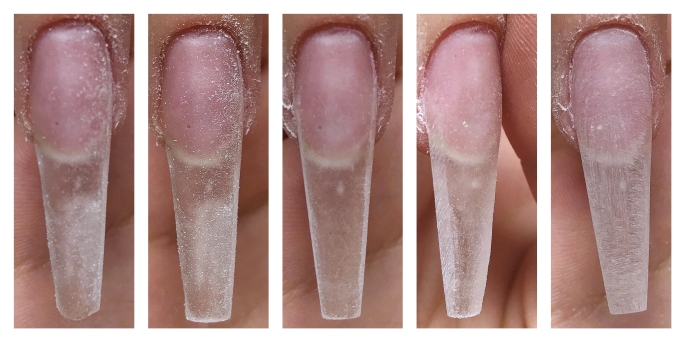
Again, from the top… I always go straight in and file the right sidewall, the free edge, then the left side wall. Photo four in the collage above demonstrates exactly what I was talking about further up. A LOT of people who ask me how I get my side walls so straight, or those who feel frustrated because they just can’t understand where they’re going wrong… THIS is it 🙂 A Lot of the time, nails look wide, bulky or bowed out because nail technicians try to attack the free edge shape. It really doesn’t take much work to get the actual shape correct (this can always be seen when looking at the nails from behind), where the problem actually lies is the bulk of the acrylic just a bit further in from the side walls. If the acrylic looks bulky, then it’s not always necessarily the shape, it could just be that you have too much product on top of the nail which will protrude out to the sides. *I really flipping hope this is making sense because it’s actually one of the hardest things to explain*.

This is what my clear base looks like once filed and shaped. It only needs to be thick enough so that it doesn’t snap when filing prior to applying your design work. If you do this layer too thick, then you are setting yourself up for bulky nail and/or the annoyance that we’ve all experienced which is filing off the design we’ve spent ages applying, capping and filing haha. Keep this thin and don’t skimp of this stage. Pay attention to your surface, and make sure that there is no bulk anywhere. I can try and explain it alllllll day, but it really does just click one day.
Another tip that I can give, is that when filing your finished nail, the top of the apex to the tip of the nail should be dead straight. I see so many nails that look bulbous in this area, almost like a hill. Make sure that this is straight and it will help with the overall refinement.
Below I’ve added a step-by-step of the shaping that I try and achieve at each stage of a custom set. I hope this blog has helped! If it has, please let me know in the comments! ❤
Love to you all xox

How To Use & Style Angel Paper

No rest for the wicked right?! I’m back again but to talk about Marmite’s sister. You either love or HATE angel paper. I, personally LOVE it. Of course I do. It can literally take a set from “oooh, they’re nice!” to “HOLY GUACAMOLE, LOOK SHARON, LOOK AT THESE!!!”.
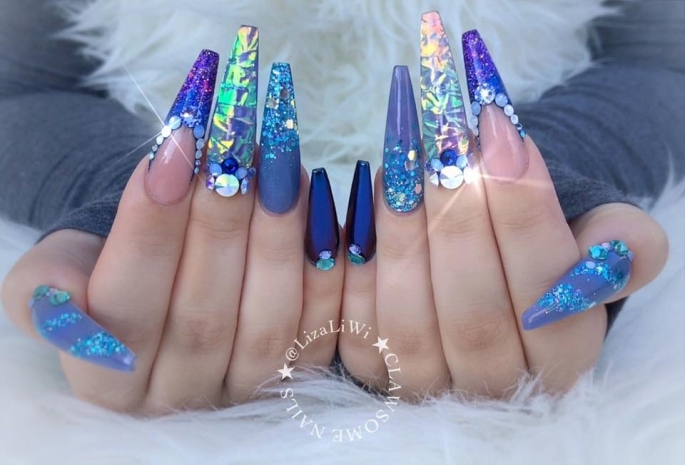
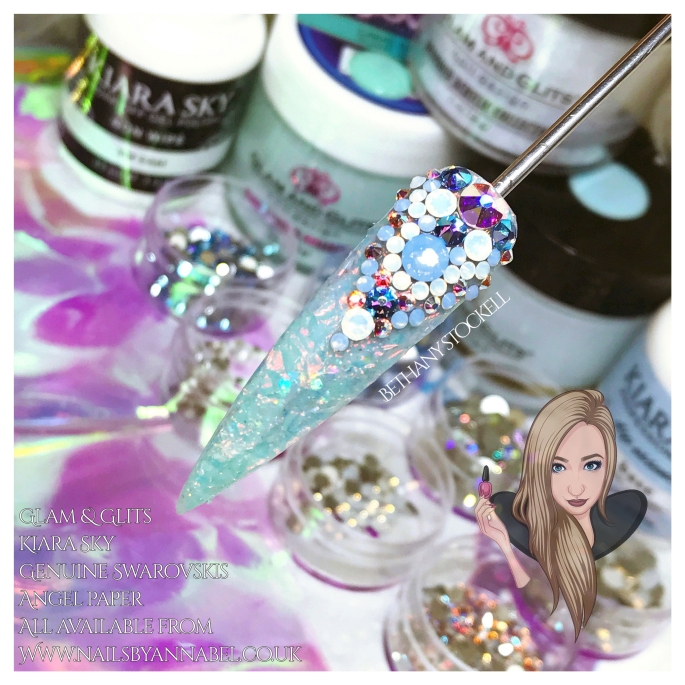
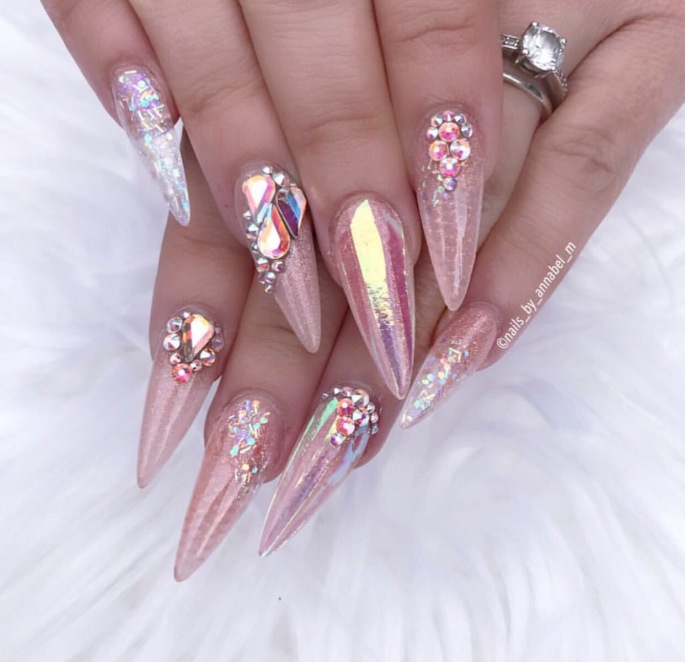
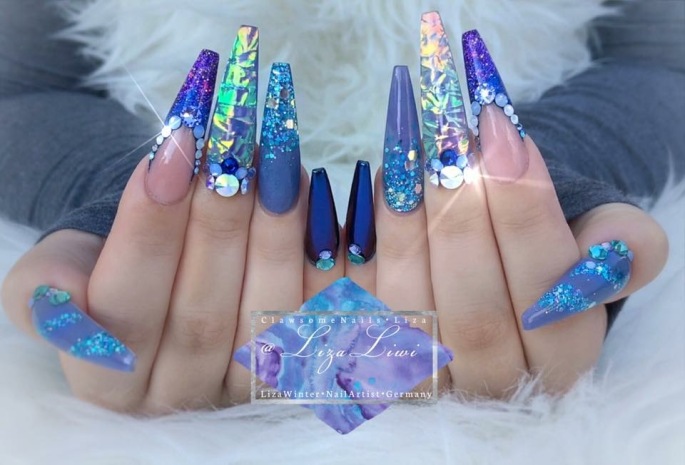
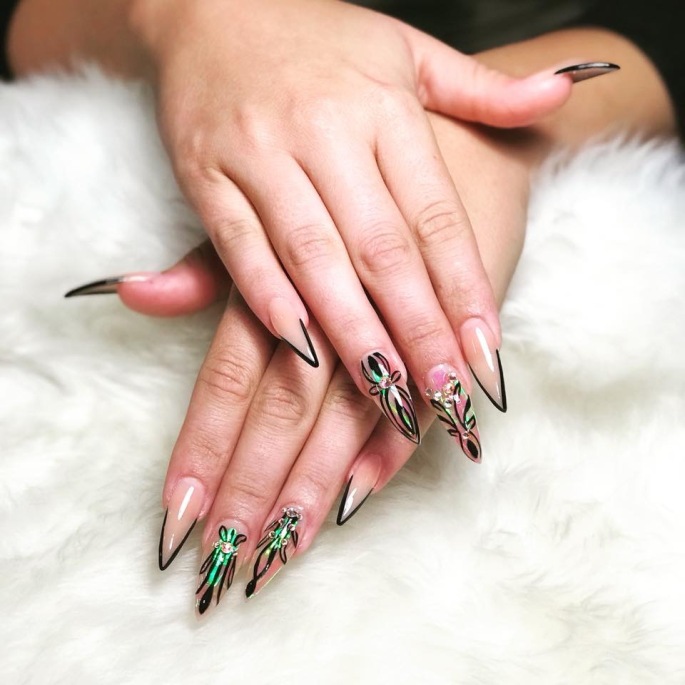
Today I’m going to talk about how I achieved these four looks below…


(Crystal placement and Swarovski information can be found in two of my other blogs)
I’ve had so many questions on how I did these nails and I know that a lot of people struggle to create full angel paper nails. Let me tell you if you haven’t already attempted it, it’s tricky!! It takes patience, perseverance and repetition.
First of all, you want to choose what angel paper you are going to be using. We could sit here all day choosing what colour we want to use, but I’m talking about whether you choose to use a transparent Mother Of Pearl one, or an opaque colour. The one I used for all four nails above were transparent Mother Of Pearl sheets. This means that what you put underneath can be seen through the paper. So, if you choose a coloured angel paper, then it doesn’t matter what you apply underneath (acrylic wise), you can just go straight in with clear acrylic as a base, but if you go with a transparent one, think about what coloured acrylics you might want to put underneath.
- Start by laying down your chosen coloured acrylic. You do not want to add any bulk at this stage (or any stage really lol).
- When the acrylic is almost fully dry, take a small square of angel paper that is too big for the nail, press it into the acrylic (you only need the acrylic wet enough to stop the paper from moving around when sizing it up so wait until it’s gummy like) and cut the angel paper a little bit bigger than the whole nail (it will become smaller after the next stage) whilst making sure you follow the correct shape of the nail.
- Once you have the angel paper cut to shape, crumple the piece into a tiny ball (the more you crumple it, the more lines and shapes the angel paper will reflect in the finished result). Then unfold it so it is straight again.
- Now your angel paper is ready to go (this may take a few practices to get right), lay a thin bead of acrylic over the whole nail ensuring you cover the WHOLE nail. You can either do this to adhere the angel paper, or you can use a brush on glue. I personally prefer using acrylic to stick it down as you have more time to work with it.
- press the paper into the nail and make sure that all of the angel paper is stuck down. This is time-consuming but it is important that there are no gaps or pieces lifting up (they will end up being filed off or lifting from the nail).
- Once you’re happy with how secure the angel paper it, you’ll want to cut around the edge of the whole nail just to make sure that there are no bits of paper that are overhanging the nail. (Make sure at this point to leave about 1mm around the whole edge of the nail to let the acrylic underneath and the next layer of acrylic mesh together).
- Finally, cap the whole nail in clear to encapsulate the angel paper. Make sure to pay attention to the side walls and free edge as this is where the bottom side of the angel paper can completely come away from the nail.
- File, buff, cleanse and my preference to finish off the nail is to use Kiara Sky’s no-wipe UV gel topcoat. (Also sold on Annabel’s website)
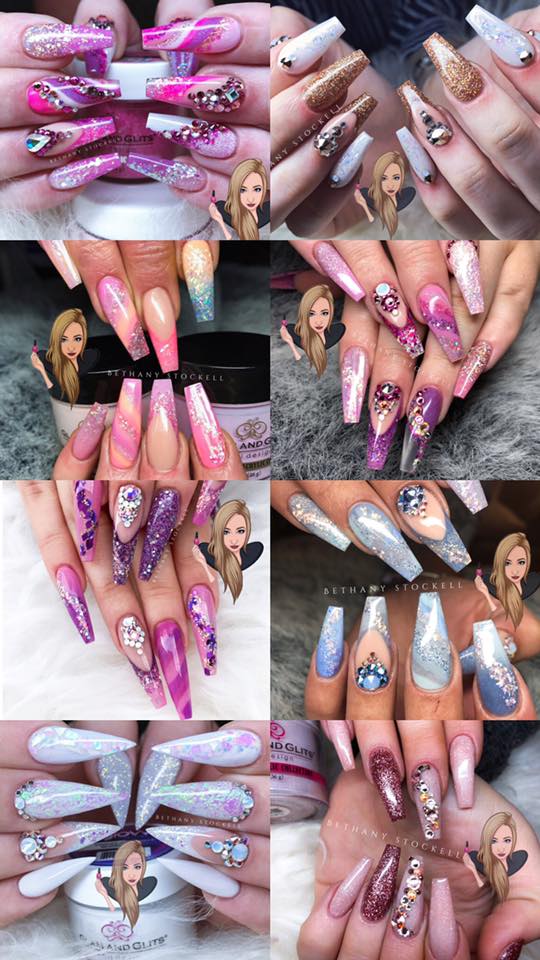
Hopefully, that is not too long-winded, but when I tried to do it the first time, I failed miserably because nobody explained it to me in depth haha. Angel paper is always fiddly to use but if you struggle with the full nail of angel paper, then start by using it in small strips. They can really spice up a set of nails and help tie in colours together that you’ve used in a set. Below are some of the times I’ve used angel paper…


So, good luck if you managed to find the angel paper in each set… I know there’s a lot going on on these nails haha, but it hopefully gives an idea of how to use it in a design set. Again, like my last blog, I’m going to feature some of my favourite work that has been entered on ‘Nails By Annabel – Support Group’ using the collection of her angel papers available from http://www.nailsbyannabel.co.uk


Credit – Annabel Maginnis, Liza Winter, Jasmine Goodridge, Katie Lockett, Kim James, Nadine Gobin, Kerrie Waite & Donna Sadler.
Love to you all xox
SaveSave